Housebus: Bathroom Riser
Howdy, gang!
This week I completed the riser platform in the middle of my bus! As anyone who’s done a skoolie conversion will tell you, planning around the wheel wells is kind of a pain in the butt. For me, I kept running into problems fitting my existing furniture and appliances around the wells in a way that was satisfactory. So, I ultimately decided that the easiest solution was going to be to just build the whole central area of the bus up to a sturdy level, and to place my bathroom on top of it.
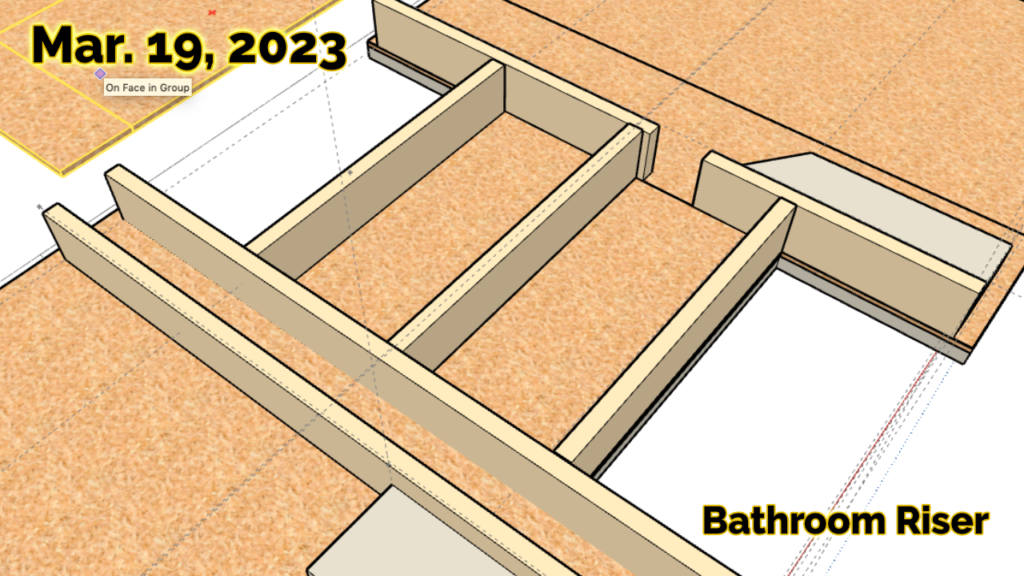
While I was playing around with this idea in SketchUp I realized it would allow me the space to move a lot of the main plumbing inside the body of the bus, rather than being exterior and needing extra insulation. Now I have this bus-wide channel where I can place the main drain from the sinks and tub/shower, as well as run water lines straight up from the fresh tank and then distribute the water to the heater and faucets. I can also use this to run some electric lines from one side of the bus to the other if I need to. I’m thinking of it like those bridges we like to put over freeways for deer and other wildlife to get across without needing to run into traffic.
The main box of the riser was built with some reclaimed 2×8 Douglas Fir I picked up earlier this week. This was the perfect size to fit just below the chair rail and still leave me enough space to fit the OSB plywood on top. I picked up a Kreg Pocket Hole jig as well, and made good use of it fastening these boards down to the subfloor. Then I was able to make use of a few pieces of fiberglass insulation I retained from the bus walls, to insulate the boxes around the metal wheel wells. The insulation was still in great shape, the only flaw there was where I’d accidentally burned it a bit when cutting off the wall panels with the angle grinder. I doubled-up the OSB in the center of the wheel well just to reinforce it a little bit across that span.

The two central boxes are below the main bathroom floor, so I wanted to reinforce those just a bit with some 2×2, lined up to where the front of the toilet cabinet is going to go. In the future the rest of that space down below will house a diesel heater aimed into my living room space at the rear of the bus, and possibly my electrical components – batteries, inverter, etc. (I still need to measure for that and see if it’ll work). This will be my Basement.
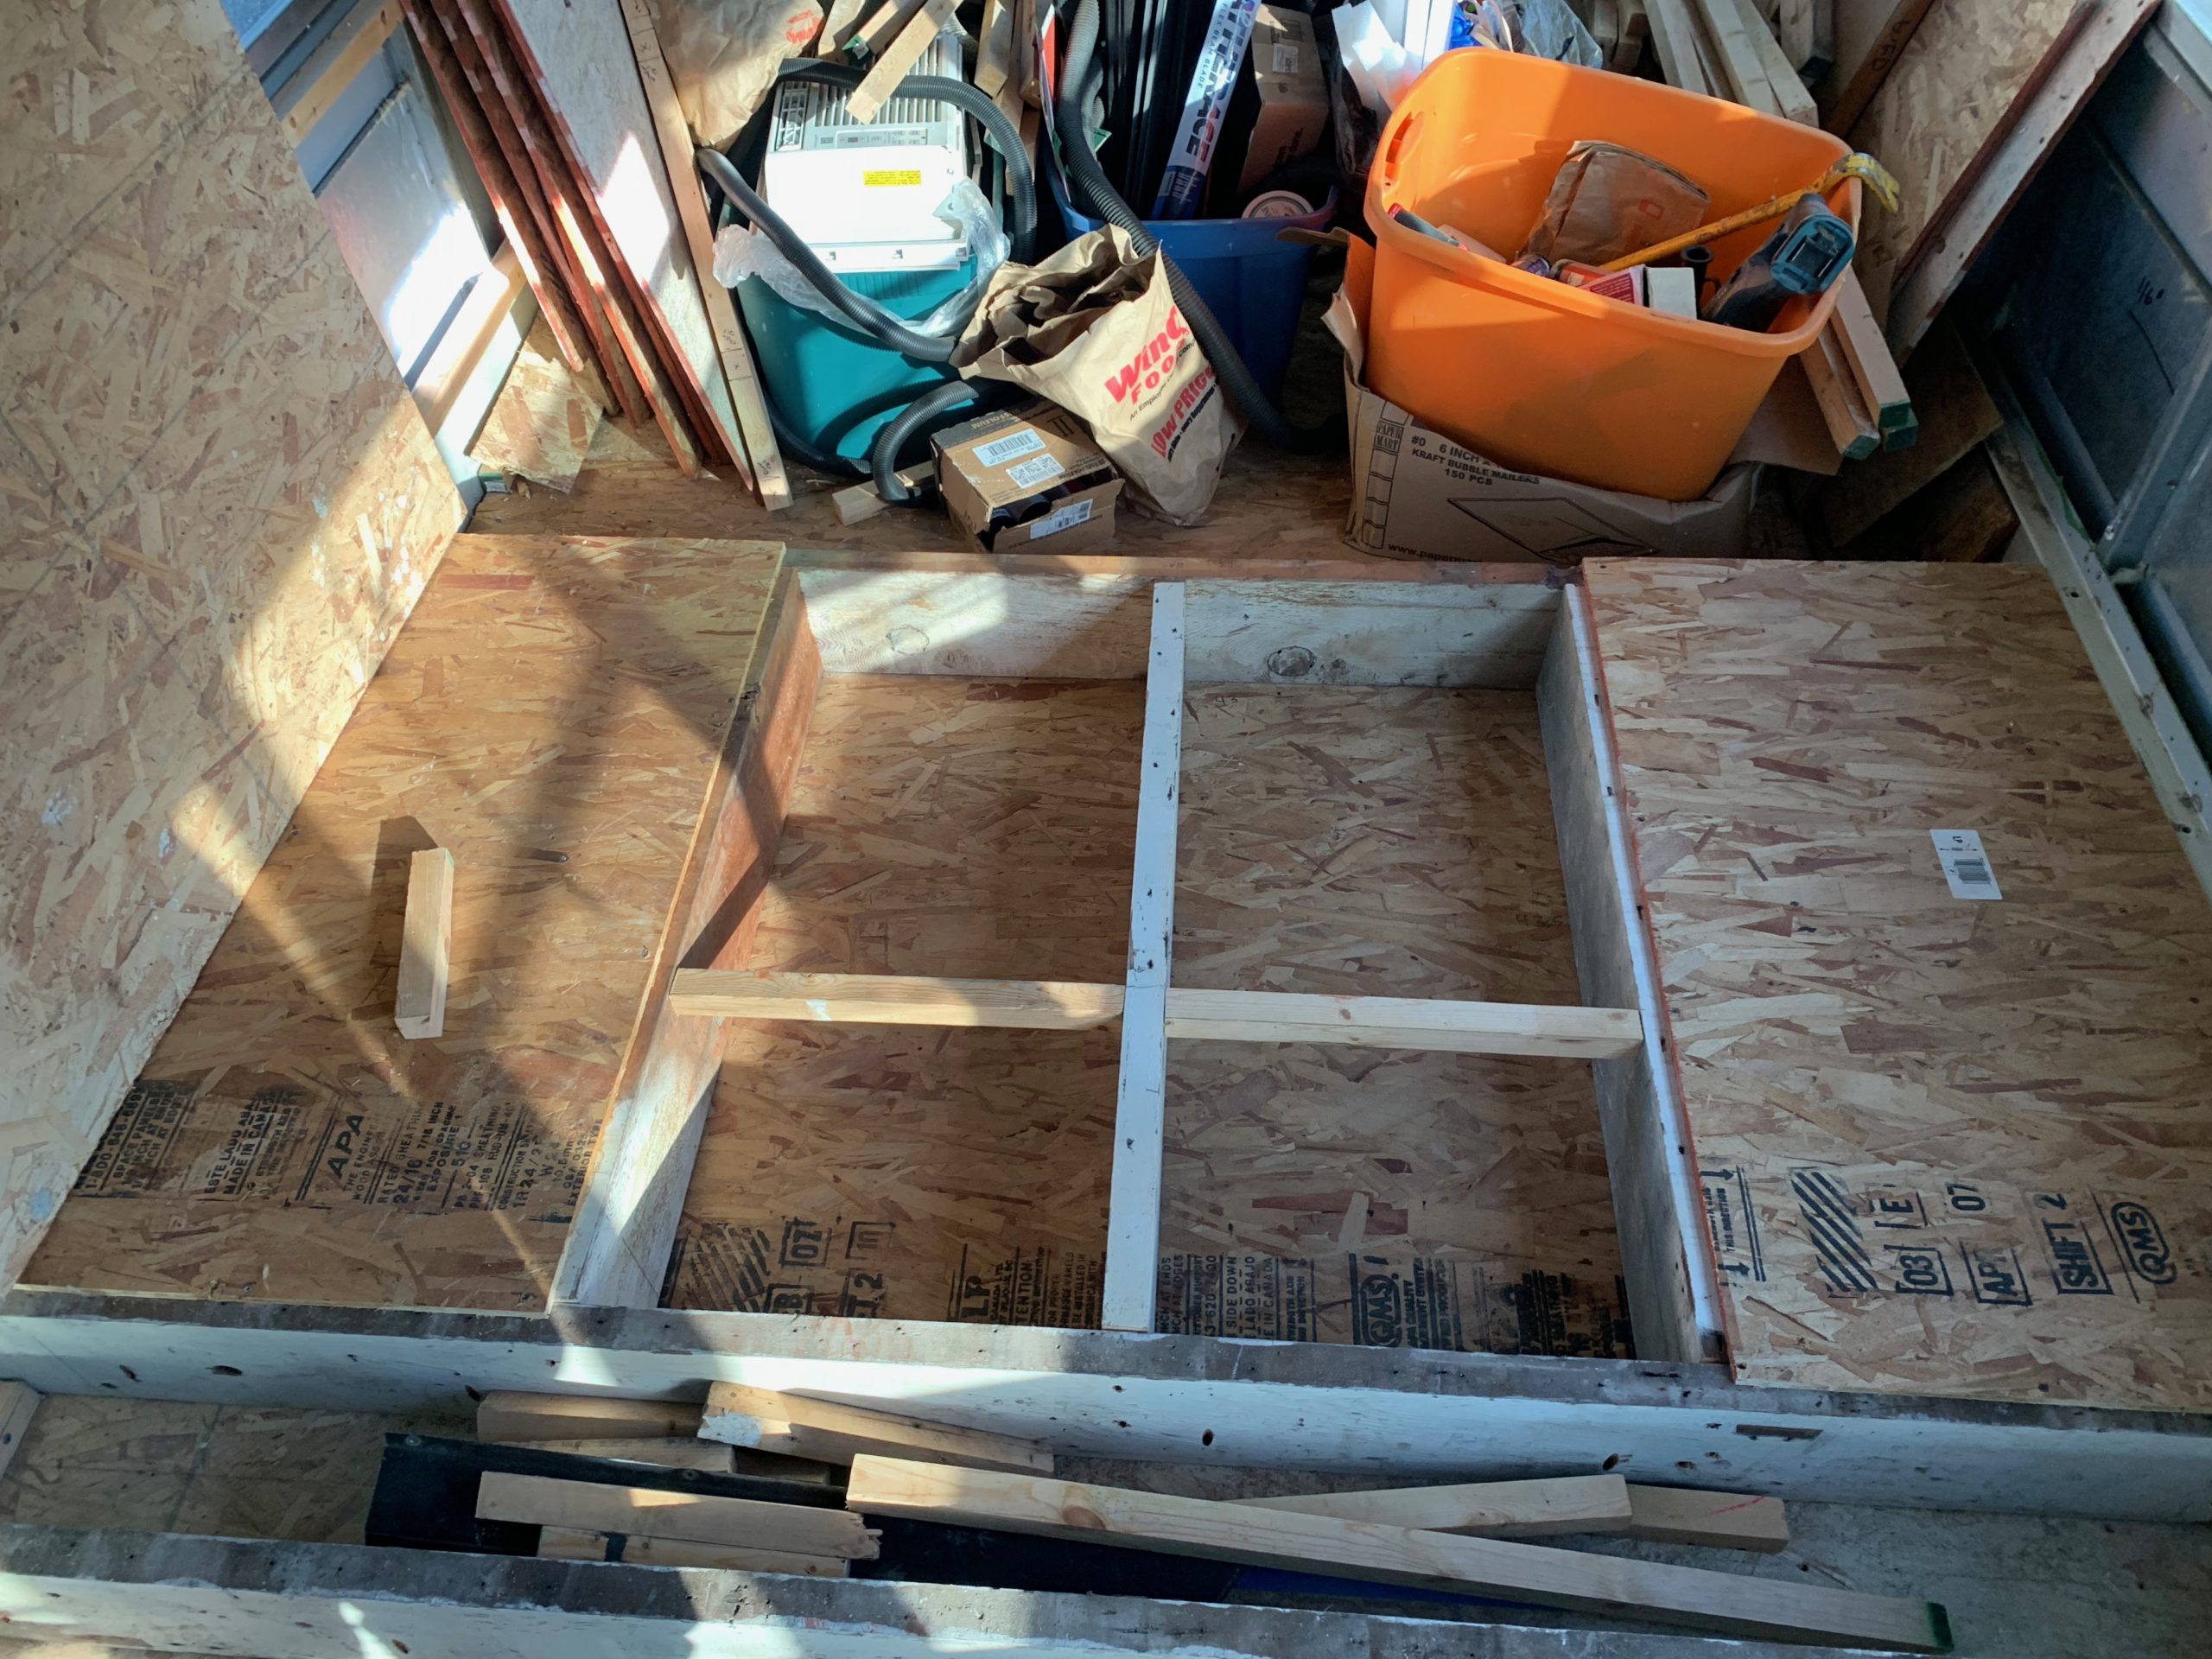
Because I’m going to want to be able to access those areas, I cut several separate pieces to cover the entire platform – two pieces for the wheel wells, one piece for the main bathroom floor, and a final piece to cover the ‘Main Drain’ channel. The wheel well covers are permanent, but the other pieces are just tacked in place with a couple screws until I need to get underneath them and work more. And with that the riser platform – and the entire subfloor structure for my housebus – is now complete!
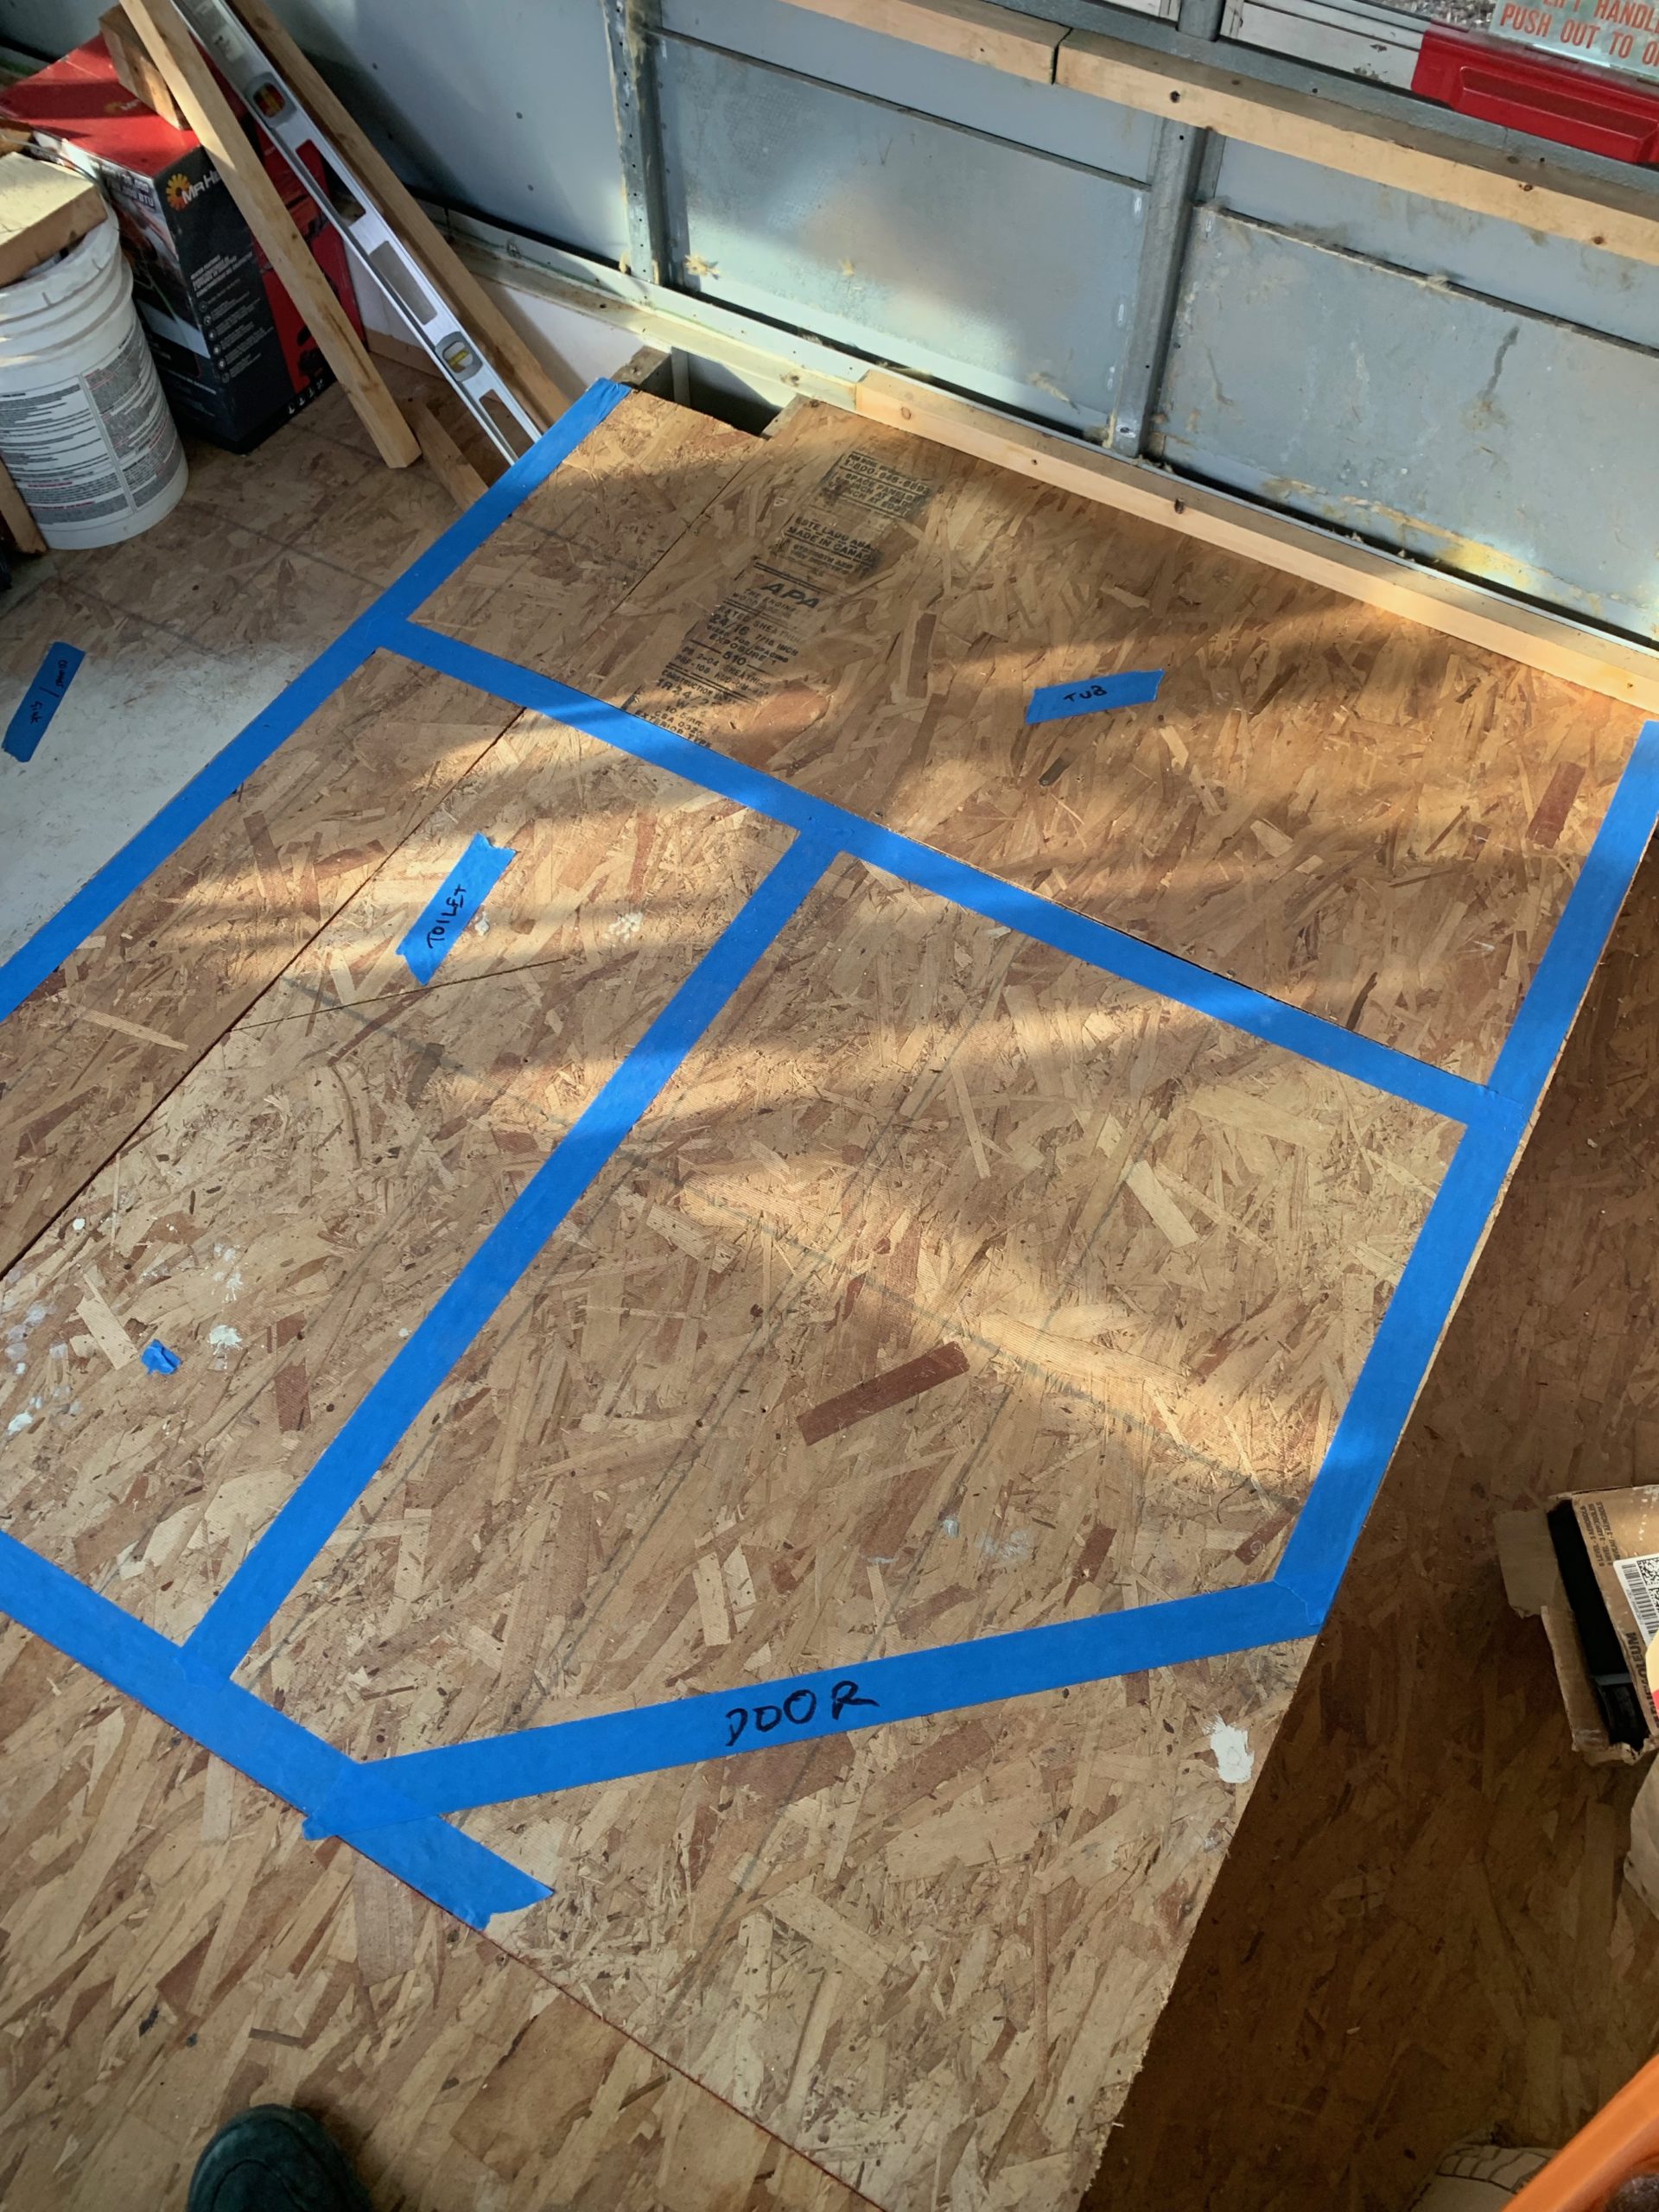
Last thing I did was tape out the basic floorplan of the bathroom – the tub/shower there under the emergency window, toilet and sink next to that along the forward wall, with the door set diagonally angled toward the rear of the bus. It’s gonna be a cute little space, and I’m just thrilled that it’s shaping up very much according to plan so far!