Subfloor Progress, Part 1
It’s official – I am in Construction Mode™ on the housebus!
After over a year of slow progress on the demo, pulling out the seats, the walls, the ceiling, the floors, the wires, and even a couple windows, I have decidedly got one foot firmly planted on the ‘building’ side of the line, as I was able to install the first section of subfloor today.
Enjoy some Progress Pictures!
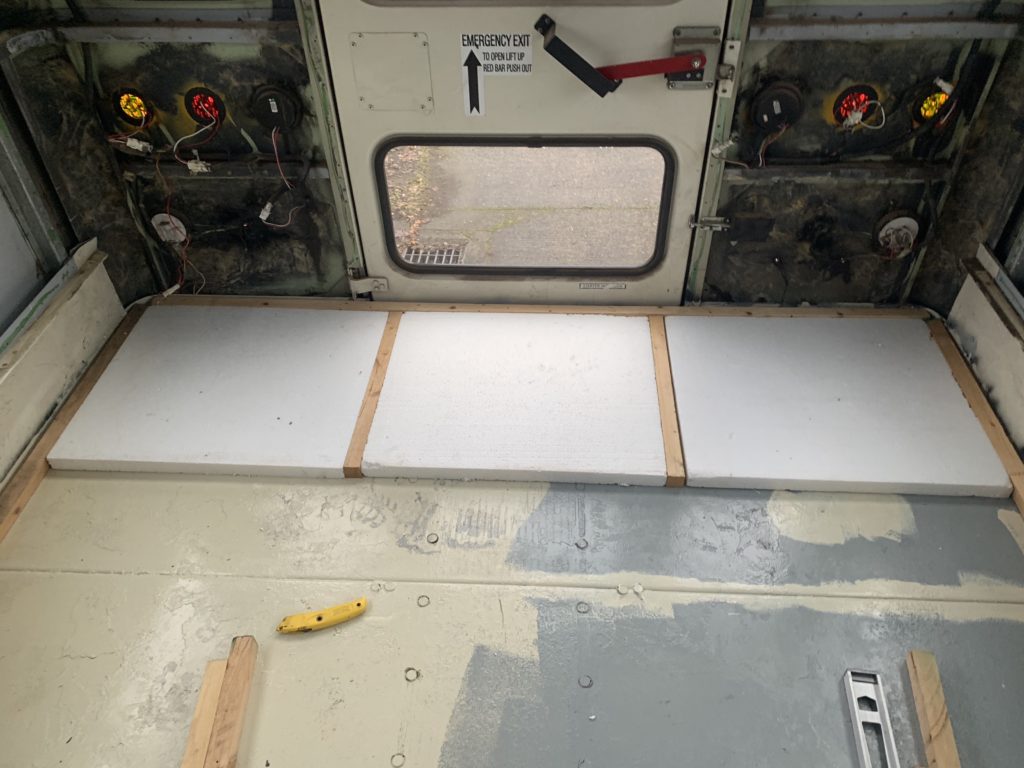

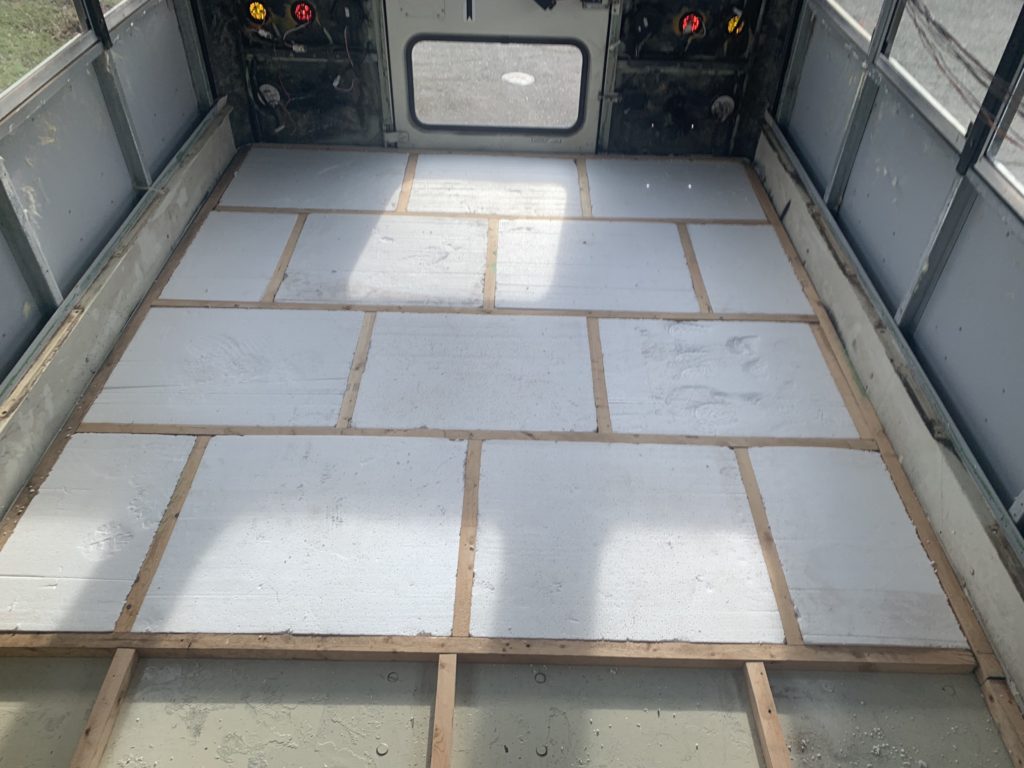
I was excited this morning to dig into the pile of cut 2×2 framing and 2″ EPS foam I picked up for free sometime early last year, that’s been occupying the entire front half of my bus since then. After going back and forth on how to secure the floor down, at the last minute I decided to do a true floating floor, and damn am I glad I did that. But I’ll get to that.
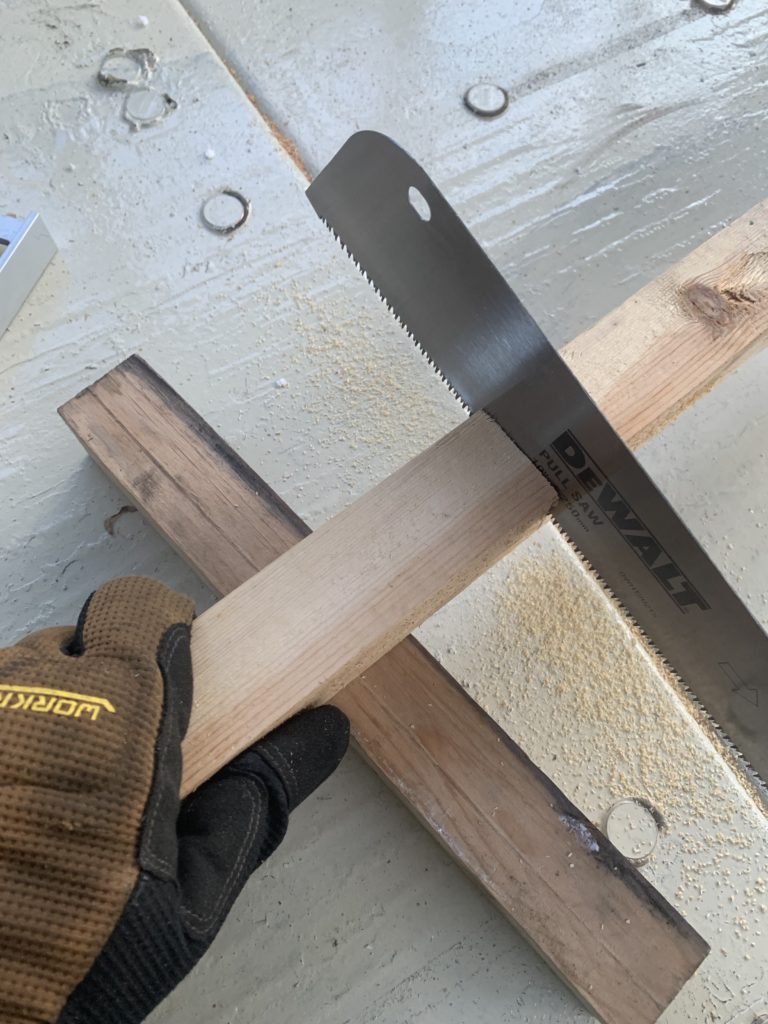
Opting to not use any screws or glue to stick the floor down meant that everything would be held down by tension so I had to make sure everything fit nice and tight. Thankfully, since the foam and 2x2s had come from the same subfloor remodel waste, they were already cut to size up pretty perfectly. The first couple rows went down really easy, though I noticed on the second one there was an extra 1″ gap somehow, so I opted to cut one of the foam panels down to accommodate a third piece of wood, and stagger the tiles. I’m hoping this will help with weight distribution? I don’t know. It wasn’t hard.
So, continuing in this fashion, I finished the third and fourth rows and I thought I was all ready to start laying down the OSB plywood that came from the same massive remodel project that yielded the foam and 2x2s. Silly me, somehow I thought that since they’d been used together before, that everything would like up as well as the foam and framing had. Hahaha, nope. Turns out they had them laid out some completely other way and somehow my floor had an extra inch or so between the horizontal ‘studs’, which meant the 4×8 foot plywood didn’t line up AT ALL.
I took a few minutes to curse silently to myself and collect my thoughts, figure out what I needed to do. I looked through the stacks of foam and wood to see if there was any that was a little shorter that I could swap in, but no luck. SO, I did the only thing I could do – start pulling the pieces up so I could shorten a couple rows by about 2 inches each. I made the executive decision to shorten the first and third rows, since there was less wood to cut in those two. I measured everything out so that the horizontal stud would land on the seam between 4×8 sheets, and I cut things down. Reassembly went a lot quicker now I had everything already collected and cut to size. And yes, I was extremely thankful that I hadn’t decided to use adhesive or screws to hold each piece down to the metal. I’m not sure what I would have done in that case.
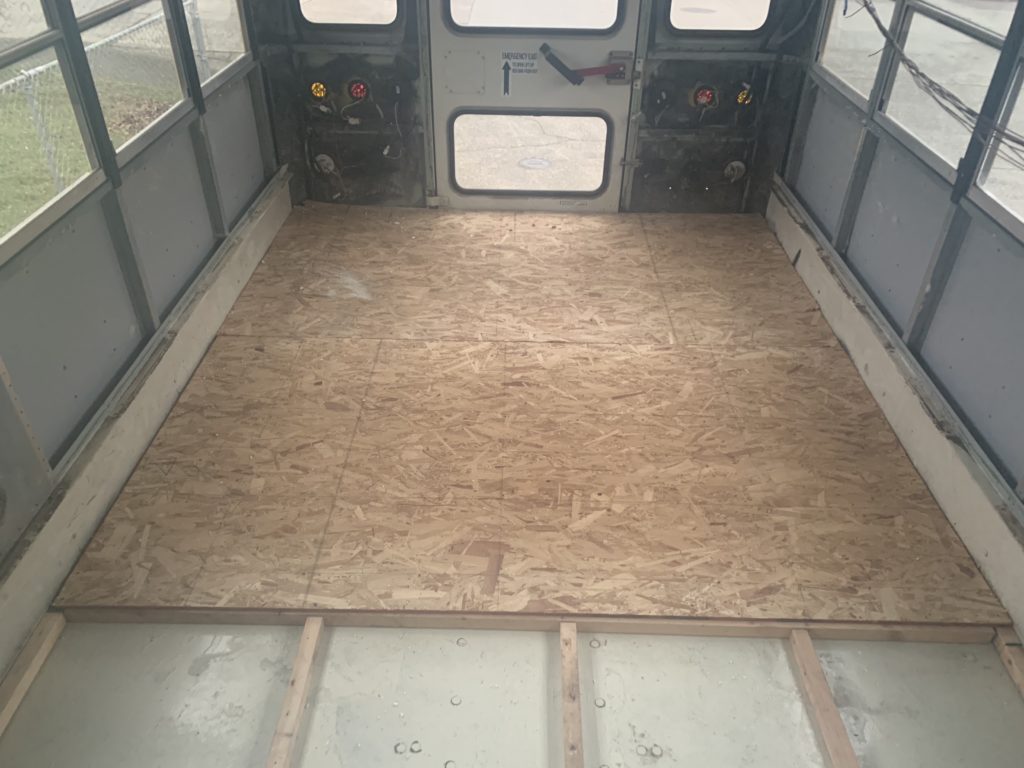
All that left was cutting about six inches off the side of the OSB to fit it across the bus, struggle to force it past the chair rails on either side, and using a few salvaged wood screws to attach the OSB to the wood framing, and voila! Eight feet of solid, somewhat-insulated subfloor! This represents about 1/4 of the total square footage of the main floor of my 39-foot skoolie.
It’s been a long time coming to be sure, but I can’t express how happy I am to be onto the first steps of actual Construction on my housebus build. Of course, the next steps are moving everything to the back of the bus so I can finish pulling up the rubber floors and the metal wall panels and the old insulation, so it’s right back to Demo mode for me, for another couple weeks or so at least.